
Django template tags and filters are huge time-savers and help you keep your presentation logic DRY and easy to maintain. Tags and filters are just small bits of code that allow you to perform formatting and simple presentation-related logic right in your template. Django filters are simple Python functions that accept a value, an optional argument, and return a value to be displayed on the page.
Out of the box, Django includes a significant number of template filters - you can see the full list here. Let's look at an example: the phone2numeric filter that's built-in to Django.
The phone2numeric template filter accepts a vanity phone number, something like 1-800-FLOWERS, and displays the actual digits on a telephone keypad: 1-800-356-9377. Keeping a conversion process like this in your template makes sense: you don't have to worry about handling this logic in your controller every time there is a page request and you also don't need to store the original and converted values in your model.
It wasn't long after I started working with Django that I discovered the need to make my own custom template filter. Being a Django beginner at the time, I was afraid that the process might be a bit out of my comfort zone as far as complexity is concerned. Fortunately, that is not the case. Making your own template filters is easy and allows you to do some pretty creative formatting in templates.
Give Your Filters A Home
First of all, you'll want to create a directory for holding your custom template filters. This is a requirement: custom template filters must live inside a Django app. Note that if you plan on building a small library of custom tags or filters, to be used across an entire project, you could create a Django app just for holding these files. If not, keep it simple: each app gets a templatetags directory at the same level as the models and views.
You'll want this directory to be recognized as a Python package, so make sure you create an empty __init__.py file. Next, go ahead and create the Python file that will hold your tags and name it something like app_filters.py or a similar name that is easily identifiable.
Here is what the folder structure should look like:
Django Project
-> my_app
---> models.py
---> views.py
---> templatetags
-----> __init__.py
-----> app_filters.py
Filters For Better UX
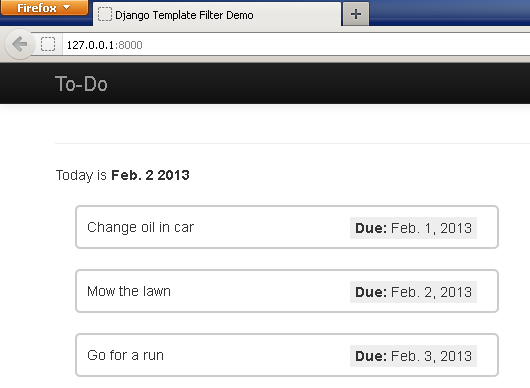
Consider a simple To-Do list application, a display made up of individual to-do items. The ToDo model consists of a name and a due date.
class ToDo(models.Model):
    name = models.CharField(max_length=50)
    due_date = models.DateField()
Here is what our page looks like right now with some light styling.
From a UX perspective, it might make sense to show the "due_date" value presented in a way that's more helpful to the end user. Instead of just spitting out the date, we can format it to read "Due in 3 days" or add extra emphasis if the item is past due.
To get started, we'll need some imports at the top of our app_filters.py file.
from django import template
from datetime import date, timedelta

register = template.Library()
What's with that register = template.Library() bit? Well, you need to make sure that your templates are added to the existing library of tags and filters that Django knows about. This statement gives an instance of the library so you can register your filters as you go about creating them. In this post you'll see that I use the handy @register decorator and pass in the name of my filter to register it with Django.
Our first filter accepts a due date, compares it to todays date, and returns a helpful string to the end user. Here it is:
@register.filter(name='get_due_date_string')
def get_due_date_string(value):
    delta = value - date.today()

    if delta.days == 0:
        return "Today!"
    elif delta.days < 1:
        return "%s %s ago!" % (abs(delta.days),
            ("day" if abs(delta.days) == 1 else "days"))
    elif delta.days == 1:
        return "Tomorrow"
    elif delta.days > 1:
        return "In %s days" % delta.days
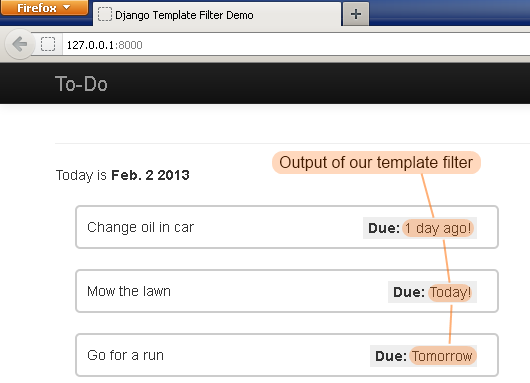
Notice in the first line that we register this template with Django and give it the name of filter. Our function accepts a value, which would be a due_date.
Now we will use our filter in our template. We start by adding the {% load app_filters %} tag, which will load the filters specified in the -- you guessed it: app_filters.py file. You can also see the filter applied to the due date:
{% load app_filters %}
{% for todo in todos %}
    ...
    <div class='due_date'>
        <b>Due:</b> {{ todo.due_date|get_due_date_string }}
    </div>
    ...
{% endfor %}
And now, our page looks like this:
Some Style And Class
Here's a neat trick you can do with template filters: applying a calculated style or CSS to an item after some filter logic. In our To-Do application, we want to make sure that items are highlighted with a border depending on how soon they are due. Let's create another filter that generates a hex color value based on due date.
@register.filter(name='get_due_date_color')
def get_due_date_color(value):
    delta = value - date.today()

    if delta.days < 1:
        return "#FF0000"
    elif delta.days <= 3 :
        return "#FF7400"
    else:
        return "#00CC00"
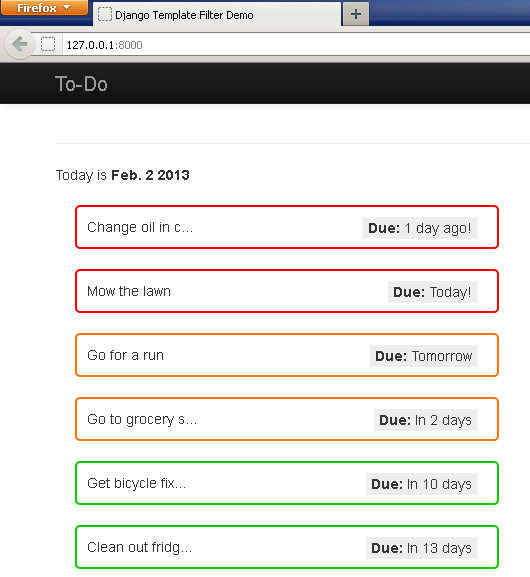
This function returns a bright red color if a task is past due or due today, an orange warning if the task is due soon and lastly green for all other tasks. Going back to the template, we can simply echo out these hex colors in a style attribute.
<div style='border: 2px solid {{todo.due_date|get_due_date_color}};'>
Now, our page looks like this

It's probably best to echo out a CSS class name and specify the desired hex values in your stylesheet, but I wanted to demonstrate how you can use filters to work with the actual markup of your page.
Let's Have An Argument
Template tags can also accept an argument. For our next task, we want to truncate long strings and append ellipses "..." to strings that exceed a certain length. .
@register.filter(name='ellipses')
def ellipses(value, arg):
    original_string = value
    max_length = arg

    if len(original_string) <= max_length:
        return original_string
    else:
        return original_string[:max_length] + "..."
This is how you include an argument, in this case our fifteen character limit, with your template filter.
{% load app_tags %}
{% for todo in todos %}
        ...
        <div class='name'>
            {{ todo.name|ellipses:15 }}
        </div>
        ...
When we render our template now, you can see the ellipses applied after 15 characters.
Some Things To Know Before You Go
A few important things to remember: pay attention to how you'll want your custom filter to work with the default escaping that occurs in Django templates. If you think you will need to work with raw, unescaped HTML, I strongly recommend studying up on template filters and escaping in the Django documentation to refresh your memory.
Also, you should make sure you silently handle any exceptions within your filters. While I'm a big fan of using exceptions to manage function logic and flow, you should avoid them in your filters. Your best bet is to do one of two things: either return an empty string if something goes wrong or just return the original value that was passed in to the filter.
(Suppose you had a filter that computed Celsius from Fahrenheit. If something fatal were to happen during the calculation, you wouldn't want to display the original Fahrenheit temperature value with the wrong label - it might be best to render nothing at all and avoid displaying an obviously erroneous value)